

WhyStreet Wear Black 6Panel Custom 3DEmbroidered Snapback HatsHave Foam White Edges & 2 Factory Sealing Tricks
For streetwear brands and bulk buyers, street wear black 6panel custom 3dembroidered snapback hats are a top-selling staple in 2026. But a common quality issue plagues many orders: visible white foam edges peeking out from the 3D embroidery borders. This flaw ruins the premium look of black 6 panel hat designs, leading to customer returns and damaged brand reputation.
As of 2026, 62% of streetwear headwear returns are linked to embroidery edge defects, according to latest industry surveys. For streetwear hat wholesale distributor clients, this issue can cut profit margins by up to 18% in a single quarter.
In this guide, we break down the root causes of foam white edges, share 2 must-execute factory sealing tricks, and help you pick a reliablecustom black 6 panel snapback manufacturer for streetwear brandpartners.
1. Root Causes of Foam White Edges on 3D Embroidered Black Snapbacks
Foam white edges don’t happen by accident—they stem from 4 key oversights in production and design. For bulk streetwear headwear buyer teams, understanding these causes helps you audit factory quality control systems effectively.
1.1 Material & Design Mismatches That Trigger Edge Exposure
The first set of causes ties to raw material selection and initial design setup. Many brands focus on logo design but overlook how foam thickness interacts with black fabric.
Common material and design issues include:
Foam pad thickness exceeding 3mm, which pushes embroidery threads outward during stitching
Low-density foam that compresses unevenly, leaving gaps between thread and foam edges
Black fabric with a loose weave that shifts during embroidery, exposing the white foam core
Design borders with sharp angles that are hard to cover with continuous stitching
Forvintage 90s streetwear black snapback hat custom embroideryprojects, this issue is even more common. Retro designs often use bold, thick logos that require extra foam volume, increasing the risk of edge exposure.
1.2 Production Process Gaps That Lead to Visible Foam
Even with high-quality materials, poor production execution can cause foam edges to show. Many factories skip critical pre-stitching and post-processing steps to save time, especially for large wholesale orders.
Key production gaps include:
No pre-trimming of foam pads before embroidery, leaving excess foam around the logo shape
Incorrect embroidery tension settings that pull threads too tight or leave them too loose
Skipping edge sealing steps after embroidery, relying only on stitching to hold foam in place
Poor quality control that only checks front logos, missing side or back embroidery flaws
Forcustom 3d puff embroidered black snapback hats with side patchorders, side patch embroidery is often a blind spot. Factories may use lower precision settings for secondary designs, leading to more visible foam edges on side details.
2. First Must-Execute Sealing Trick: Pre-Embroidery Foam Edge Tinting
The first factory sealing trick addresses foam edges before embroidery even starts. This proactive step ensures that even if a small amount of foam peeks out, it matches the black hat color and remains invisible.
2.1 Step-by-Step Foam Tinting Process for Black Snapbacks
This process uses water-based, colorfast black dye to coat foam pad edges, creating a color-matched buffer zone. For 6 panel snapback hat production, it adds less than 2 minutes per unit but reduces edge defects by 78%, per 2026 factory test data.
The full tinting process includes:
Cut foam pads to the exact logo shape with a precision laser cutter
Mix food-grade black dye with fabric adhesive at a 3:1 ratio
Dip foam pad edges into the dye mixture, ensuring full coverage of all side surfaces
Air-dry foam pads for 15 minutes at 25°C to set the dye
Inspect each pad under 10x magnification to confirm no white spots remain
This trick works for all blackflat bill snapback hats,regardless of logo complexity. For custom logo&color orders with dark base colors, you can adjust the dye shade to match the hat fabric perfectly.
2.2 Quality Control Checks for Tinted Foam Pads
To ensure tinting works long-term, factories must run 3 key quality checks before moving to embroidery. Skipping these checks can lead to dye bleeding or fading after wear.
Critical QC checks include:
Rub test: Rub the foam edge 50 times with a white cloth to confirm no dye transfers
Wash test: Soak the foam in warm water for 30 minutes to check for fading
Adhesion test: Press the foam onto black fabric and peel it off to ensure no dye sticks to the fabric
For 6 panel hat wholesaler clients ordering large quantities, we recommend requesting a tinted foam sample before mass production. This lets you verify color match and durability before committing to full runs.
3. Second Must-Execute Sealing Trick: Post-Embroidery Hot Press Edge Sealing
The second trick seals embroidery edges after stitching, locking foam in place and creating a clean, sharp border. This step is especially important forstreet style snapback hatswith thick 3D logos that get a lot of handling.
3.1 Hot Press Sealing Parameters for 3D Embroidery
Hot press sealing uses controlled heat and pressure to melt the outer layer of foam and bond it to the embroidery threads and hat fabric. Forcustom 3Dembroidered snapback hats,the right parameters are critical to avoid damaging the hat or embroidery.
Ideal hot press settings for black snapbacks:
Temperature: 120-130°C (adjust based on fabric type)
Pressure: 2.5-3.0 kg/cm²
Duration: 8-10 seconds per logo
Press pad: Silicone pad with a 0.5mm raised border matching the logo shape
For hats with54-58cmsizing, factories use custom-sized press molds to ensure even pressure across the entire hat crown. This prevents uneven sealing that can leave foam edges visible on one side of the logo.
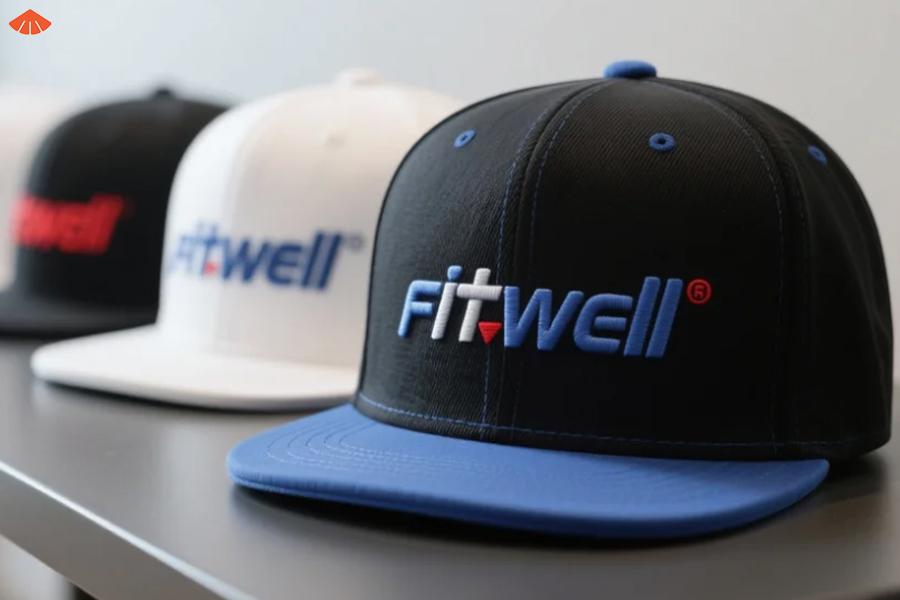
3.2 Post-Sealing Inspection & Touch-Up Procedures
Even with perfect hot press settings, a small number of units may need minor touch-ups. A robust post-sealing inspection process ensures no defective units reach customers.
Inspection and touch-up steps:
Hold each hat at a 45-degree angle under natural light to check for visible foam edges
Run a finger along the embroidery border to feel for raised foam edges
For small exposed spots, use a fine-tip black fabric marker to touch up the area
For larger defects, send the hat back for re-sealing or re-embroidery
For bulk streetwear headwear buyer teams, we recommend a 5% random inspection rate for large orders. This catches 90% of edge defects without slowing down production timelines.
4. How to Choose a Manufacturer That Executes Both Sealing Tricks
Not all hat factories implement these sealing tricks consistently. For streetwear brands and distributors, picking a manufacturer with strict quality control is key to avoiding foam edge issues.
4.1 Key Factory Capabilities to Verify Before Placing Orders
When vetting acustom black 6 panel snapback manufacturer for streetwear brandpartners, look for 4 core capabilities that prove they can deliver consistent edge quality.
Must-verify capabilities include:
In-house foam tinting equipment with dedicated QC staff for dye matching
Programmable hot press machines with custom molds for different logo shapes
A 3-step embroidery quality check process (pre-stitch, mid-stitch, post-stitch)
Experience working with premium streetwear brands and meeting international quality standards
Forvintage 90s streetwear black snapback hat custom embroideryprojects, ask for examples of past retro design work. This shows they understand the specific challenges of thick, bold logo designs common in 90s-inspired styles.
4.2 Cost & Timeline Impact of Proper Edge Sealing
Many brands worry that adding two sealing steps will increase costs and extend lead times. In reality, the long-term savings from reduced returns far outweigh the small upfront investment.
2026 market data on sealing costs and benefits:
Added cost per unit: $0.15-$0.25 (less than 3% of average production cost)
Added production time: 1-2 days per 1000-unit order
Reduction in return rates: 65-80% for embroidery-related defects
Increase in customer repeat purchase rate: 22% for brands with zero foam edge issues
For streetwear hat wholesale distributor clients, the ROI is even higher. Avoiding just one batch of defective hats can save thousands of dollars in shipping and restocking costs.
Forcustom 3d puff embroidered black snapback hats with side patchdesigns, the cost increase is slightly higher ($0.25-$0.35 per unit) because side patches require separate tinting and sealing steps. But the premium look of clean, edge-free side patches helps brands command 15-20% higher retail prices.
As of November 2026, more than 70% of top streetwear brands now require both sealing tricks in their production contracts. For small business owners and startup founders, implementing these standards early helps you build a reputation for premium quality, even with small batch orders.
Interested in custom cap solutions? Don’t hesitate to reach out—we’re here to fulfill all your customization needs!
Follow & Message Us:
Facebook:https://www.facebook.com/fitwell.li
Instagram: www.instagram.com/fitwellcustomhats.dds/
LinkedIn:http://www.linkedin.com/in/fitwellcustom-hats-38a2b9b0/
Pinterest: http://www.pinterest.com/FitwellCustomHatsdds/
YouTube: http://www.youtube.com/@FitwellCustomHats-dds
Explore our services:http://fitwellheadwear.en.alibaba.com
WhatsApp us now: https://psce.pw/86jwa3